
Important Note:
- These notes assume you have a static IP address assigned to your Ezy Server.
- Ensure the username and password is not used for authentication in the connector for the permissions to send emails through Office 365.
If you are an Ezy Cloud customer, please contact support@ezysys.com.au requesting the static IP address of your Ezy Cloud server.
- Configure Connector in Exchange Admin Centre
- Log in to the Exchange admin centre for your Office 365 account.
Navigate to Mail flow > Connectors.
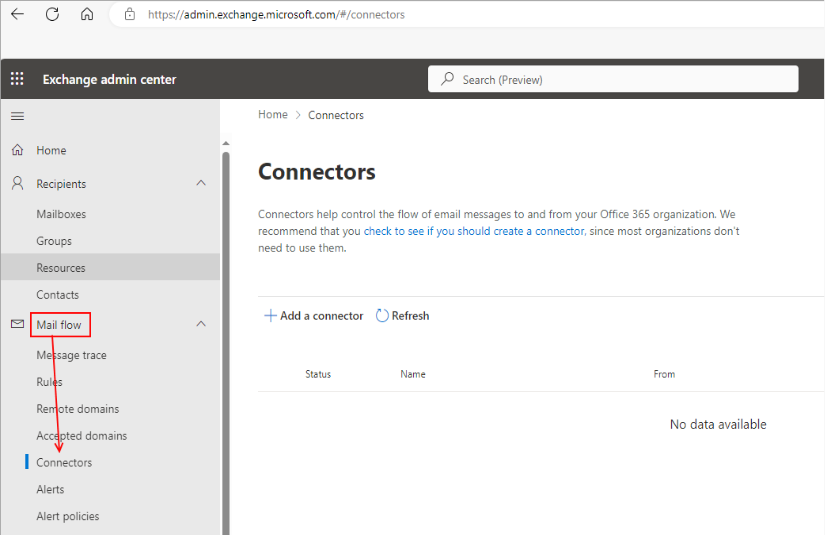
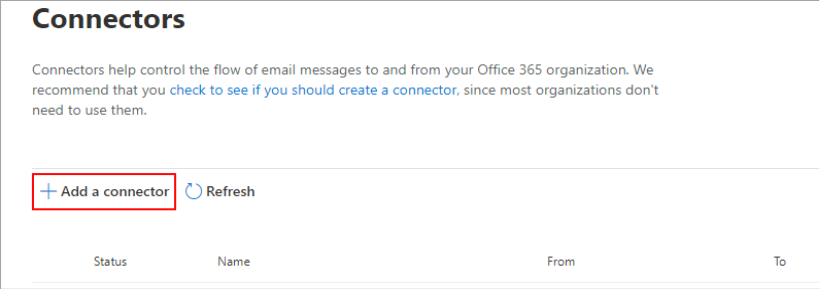
Click Add a connector and then Next.
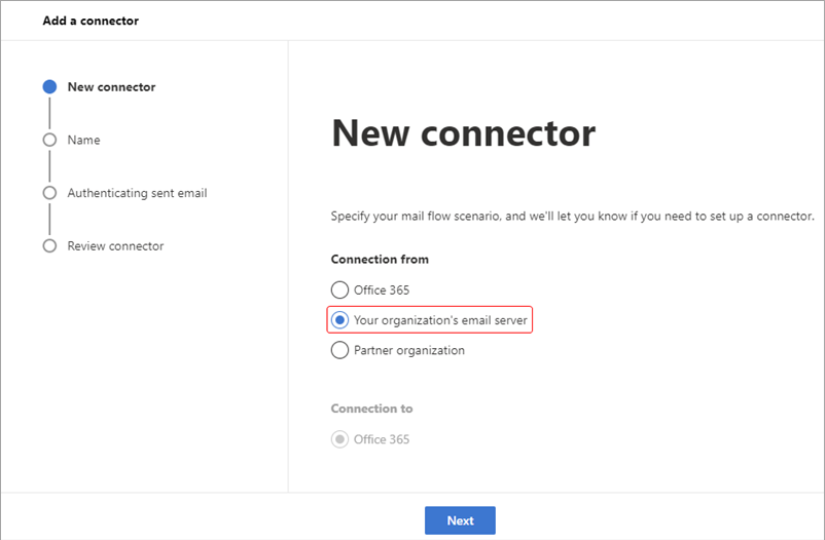
Select From your organization's email server and click Next.
Enter a descriptive name for the connector (e.g., Ezy Relay Connector) and click Next. 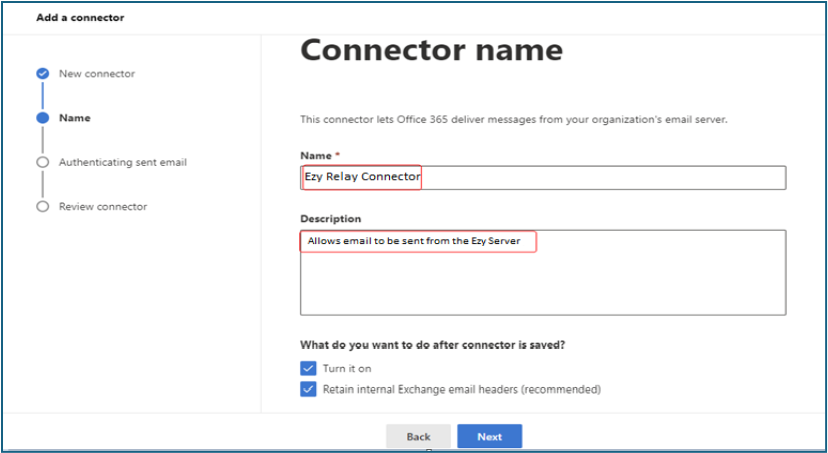
Choose to authenticate mail by verifying the sending server's IP address.
Click the + button and enter the Static IP Address of your Ezy Server.
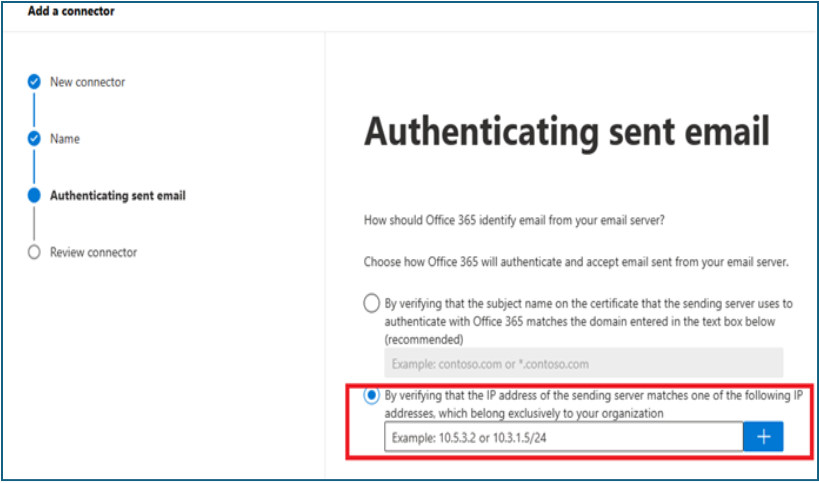
Review the settings and click Create connector.

- If your Office 365 tenant was created after January 1, 2023, you might encounter an error while enabling the connector.
- In this case, contact Microsoft Support using the following link: https://go.microsoft.com/fwlink/p/?linkid=2135368
- Explain that you need the connector enabled to send emails from Ezy.
3. Office 365 Outlook email for Authentication.
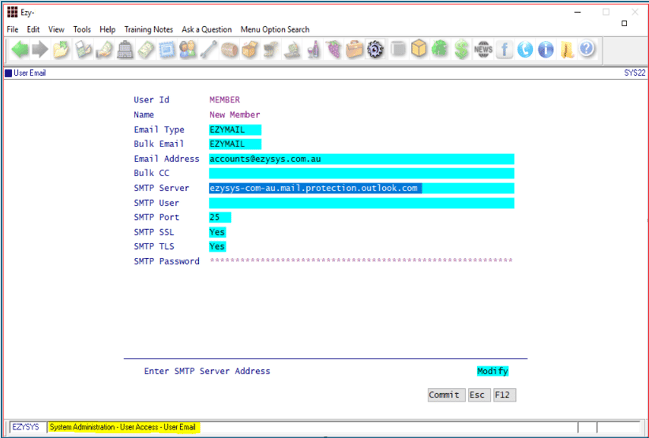
- Use the domain name and replace the ‘.’ with ‘–’ as per below image and then add .mail.protection.outlook.com to the SMTP server field.
- The IP address may also be required in the Office 365 email settings to allow the authentication process to occur successfully.
- Go To: System Administration > User Access > User Email
-
- Set the SMTP port to 25.
- Set No User ID/ SMTP Password
- Click Commit
- Press Esc