
Ezy Systems runs on Microsoft SQL Server. If you're installing SQL Server on the same machine as Ezy Systems, or on another server on the same network, follow the configuration steps below to ensure the instance performs well and has the correct permissions in place.
MS SQL Server requirements are based on database size & current Windows Server.
Where the windows server is 2019 or later, please install MS SQL 2025 Express version as it will cater up to 50GB of data for free.
Please note All earlier Express versions only cater up to 10GB and can be insufficient in some circumstances. If unsure, please reach out to the Ezy support Team.
Step-by-step instructions
1. Select the correct features during installation
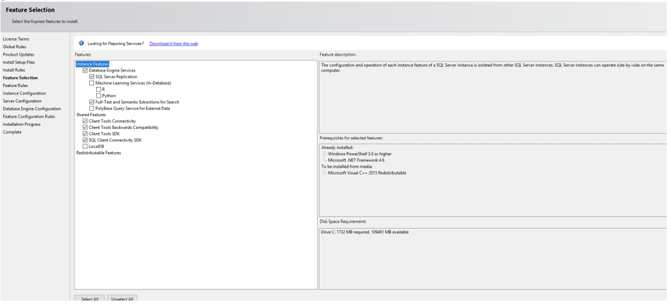
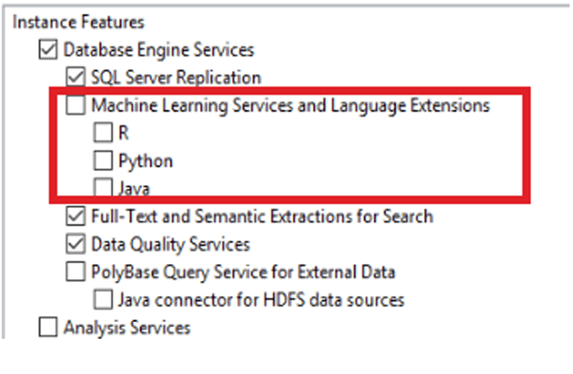
During SQL Server setup, use the standard installation and untick Machine Learning Services and Language Extensions (including R, Python, and Java). Removing these improves performance, as Ezy Systems does not require them.
Also ensure the following are selected:
- Database Engine Services
- SQL Server Replication
- Full-Text and Semantic Extractions for Search
- Data Quality Services
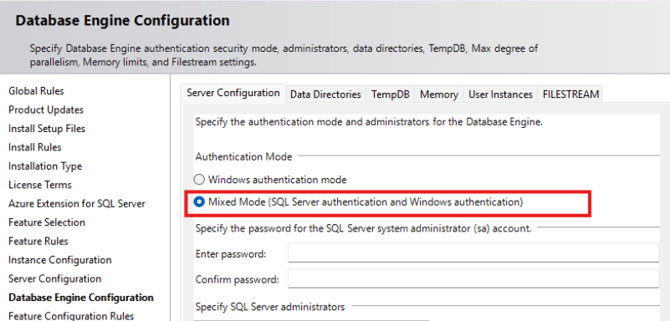
2. SQL Server Authentication set to Mixed Mode
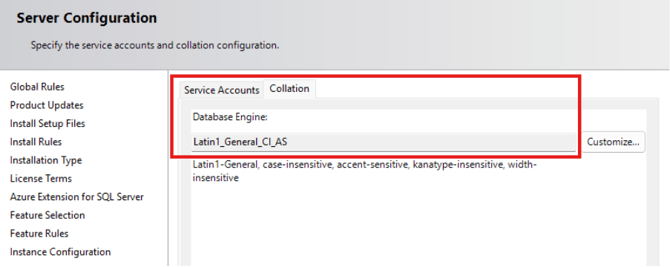
3. SQL Server Collation set to Latin1_General_CI_AS
4. Windows Users SQL Server Access
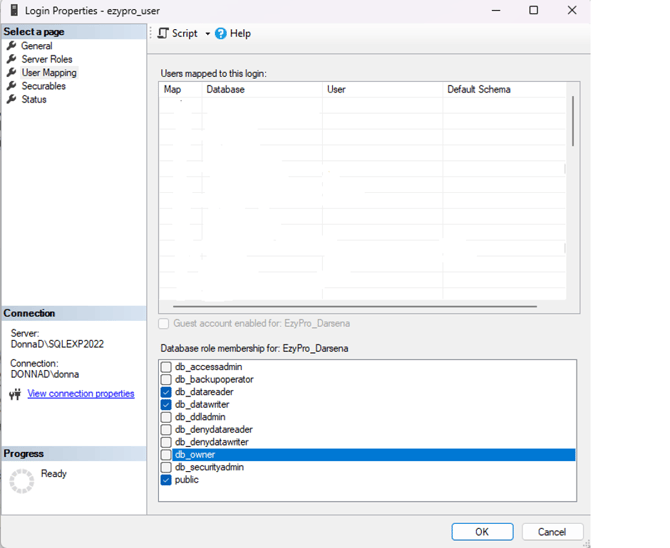
Window users which require access to the Ezy Application must be added as logins to the SQL Server, with the db_datareader/writer roles in the article.
For standard (non-admin) users, open their Login Properties and go to User Mapping. Select the appropriate Ezy Systems database, then tick db_datareader and db_datawriter under Database role membership.
5. Windows Users Copy live data to test access
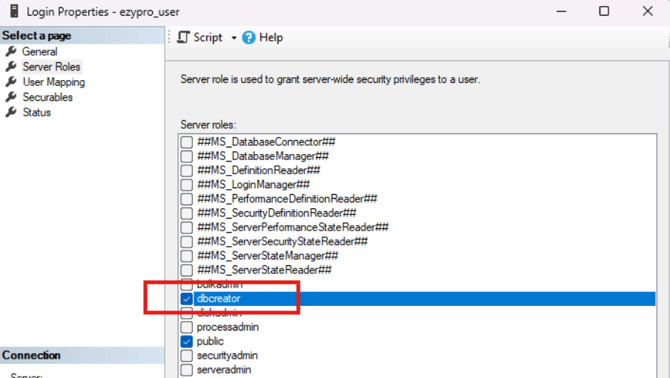
Windows Users which require the ability to copy a test database must be granted dbowner and dbcreator roles.
6. Grant sysadmin rights to the appropriate group
In Object Explorer, expand Security > Logins, right-click the relevant login or group and select Properties, then go to Server Roles. Tick sysadmin for the group that will manage the Ezy Systems database.
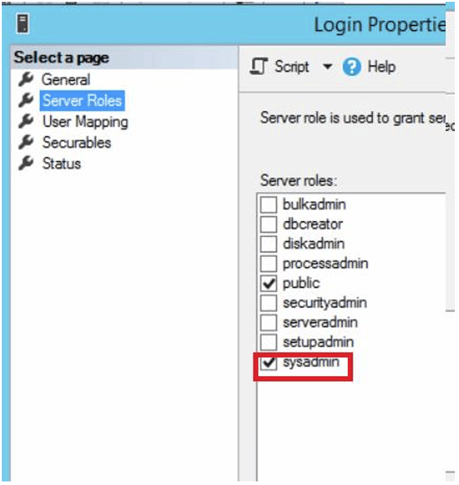
Note: Only grant sysadmin to the group responsible for managing the server. Standard users should be limited to db_datareader and db_datawriter on the relevant database only.
7. Set the maximum server memory
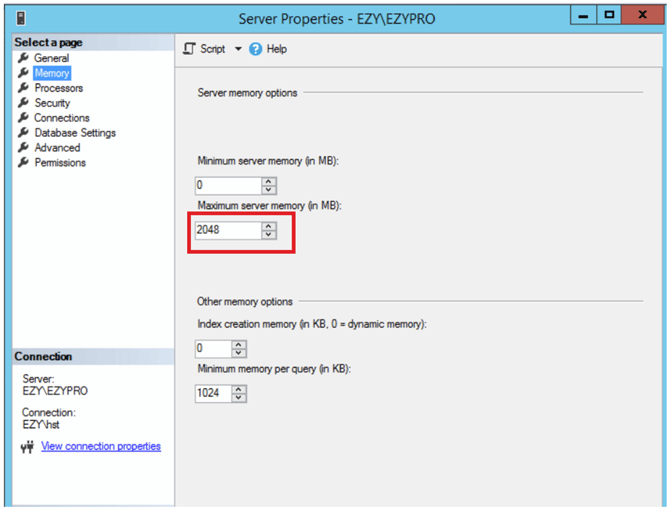
Open SQL Server Management Studio, right-click the server instance and select Properties, then go to Memory. Set Maximum server memory (in MB) according to your standard configuration and the resources available on the server.
Tip: Leave enough memory headroom for the operating system and any other applications running on the same server.
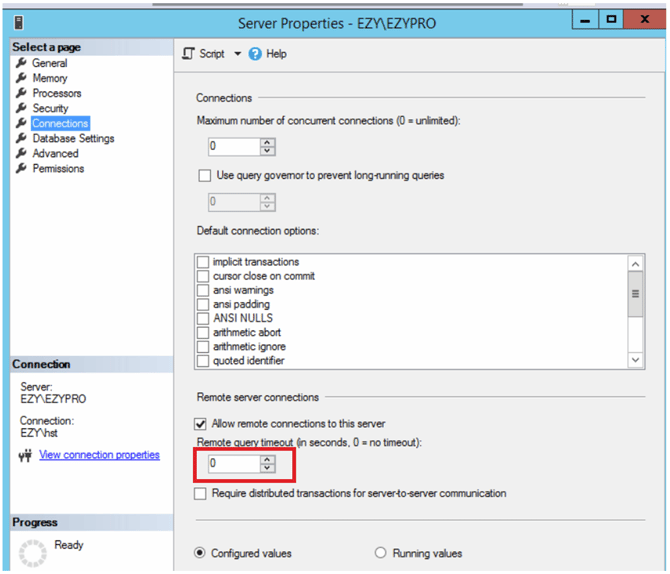
8. Set the remote query timeout to 0
Still in Server Properties, go to Connections and set Remote query timeout (in seconds) to 0 (no timeout). Confirm Allow remote connections to this server is ticked.
If you have any questions regarding installation, please contact the Ezy Systems Support Team